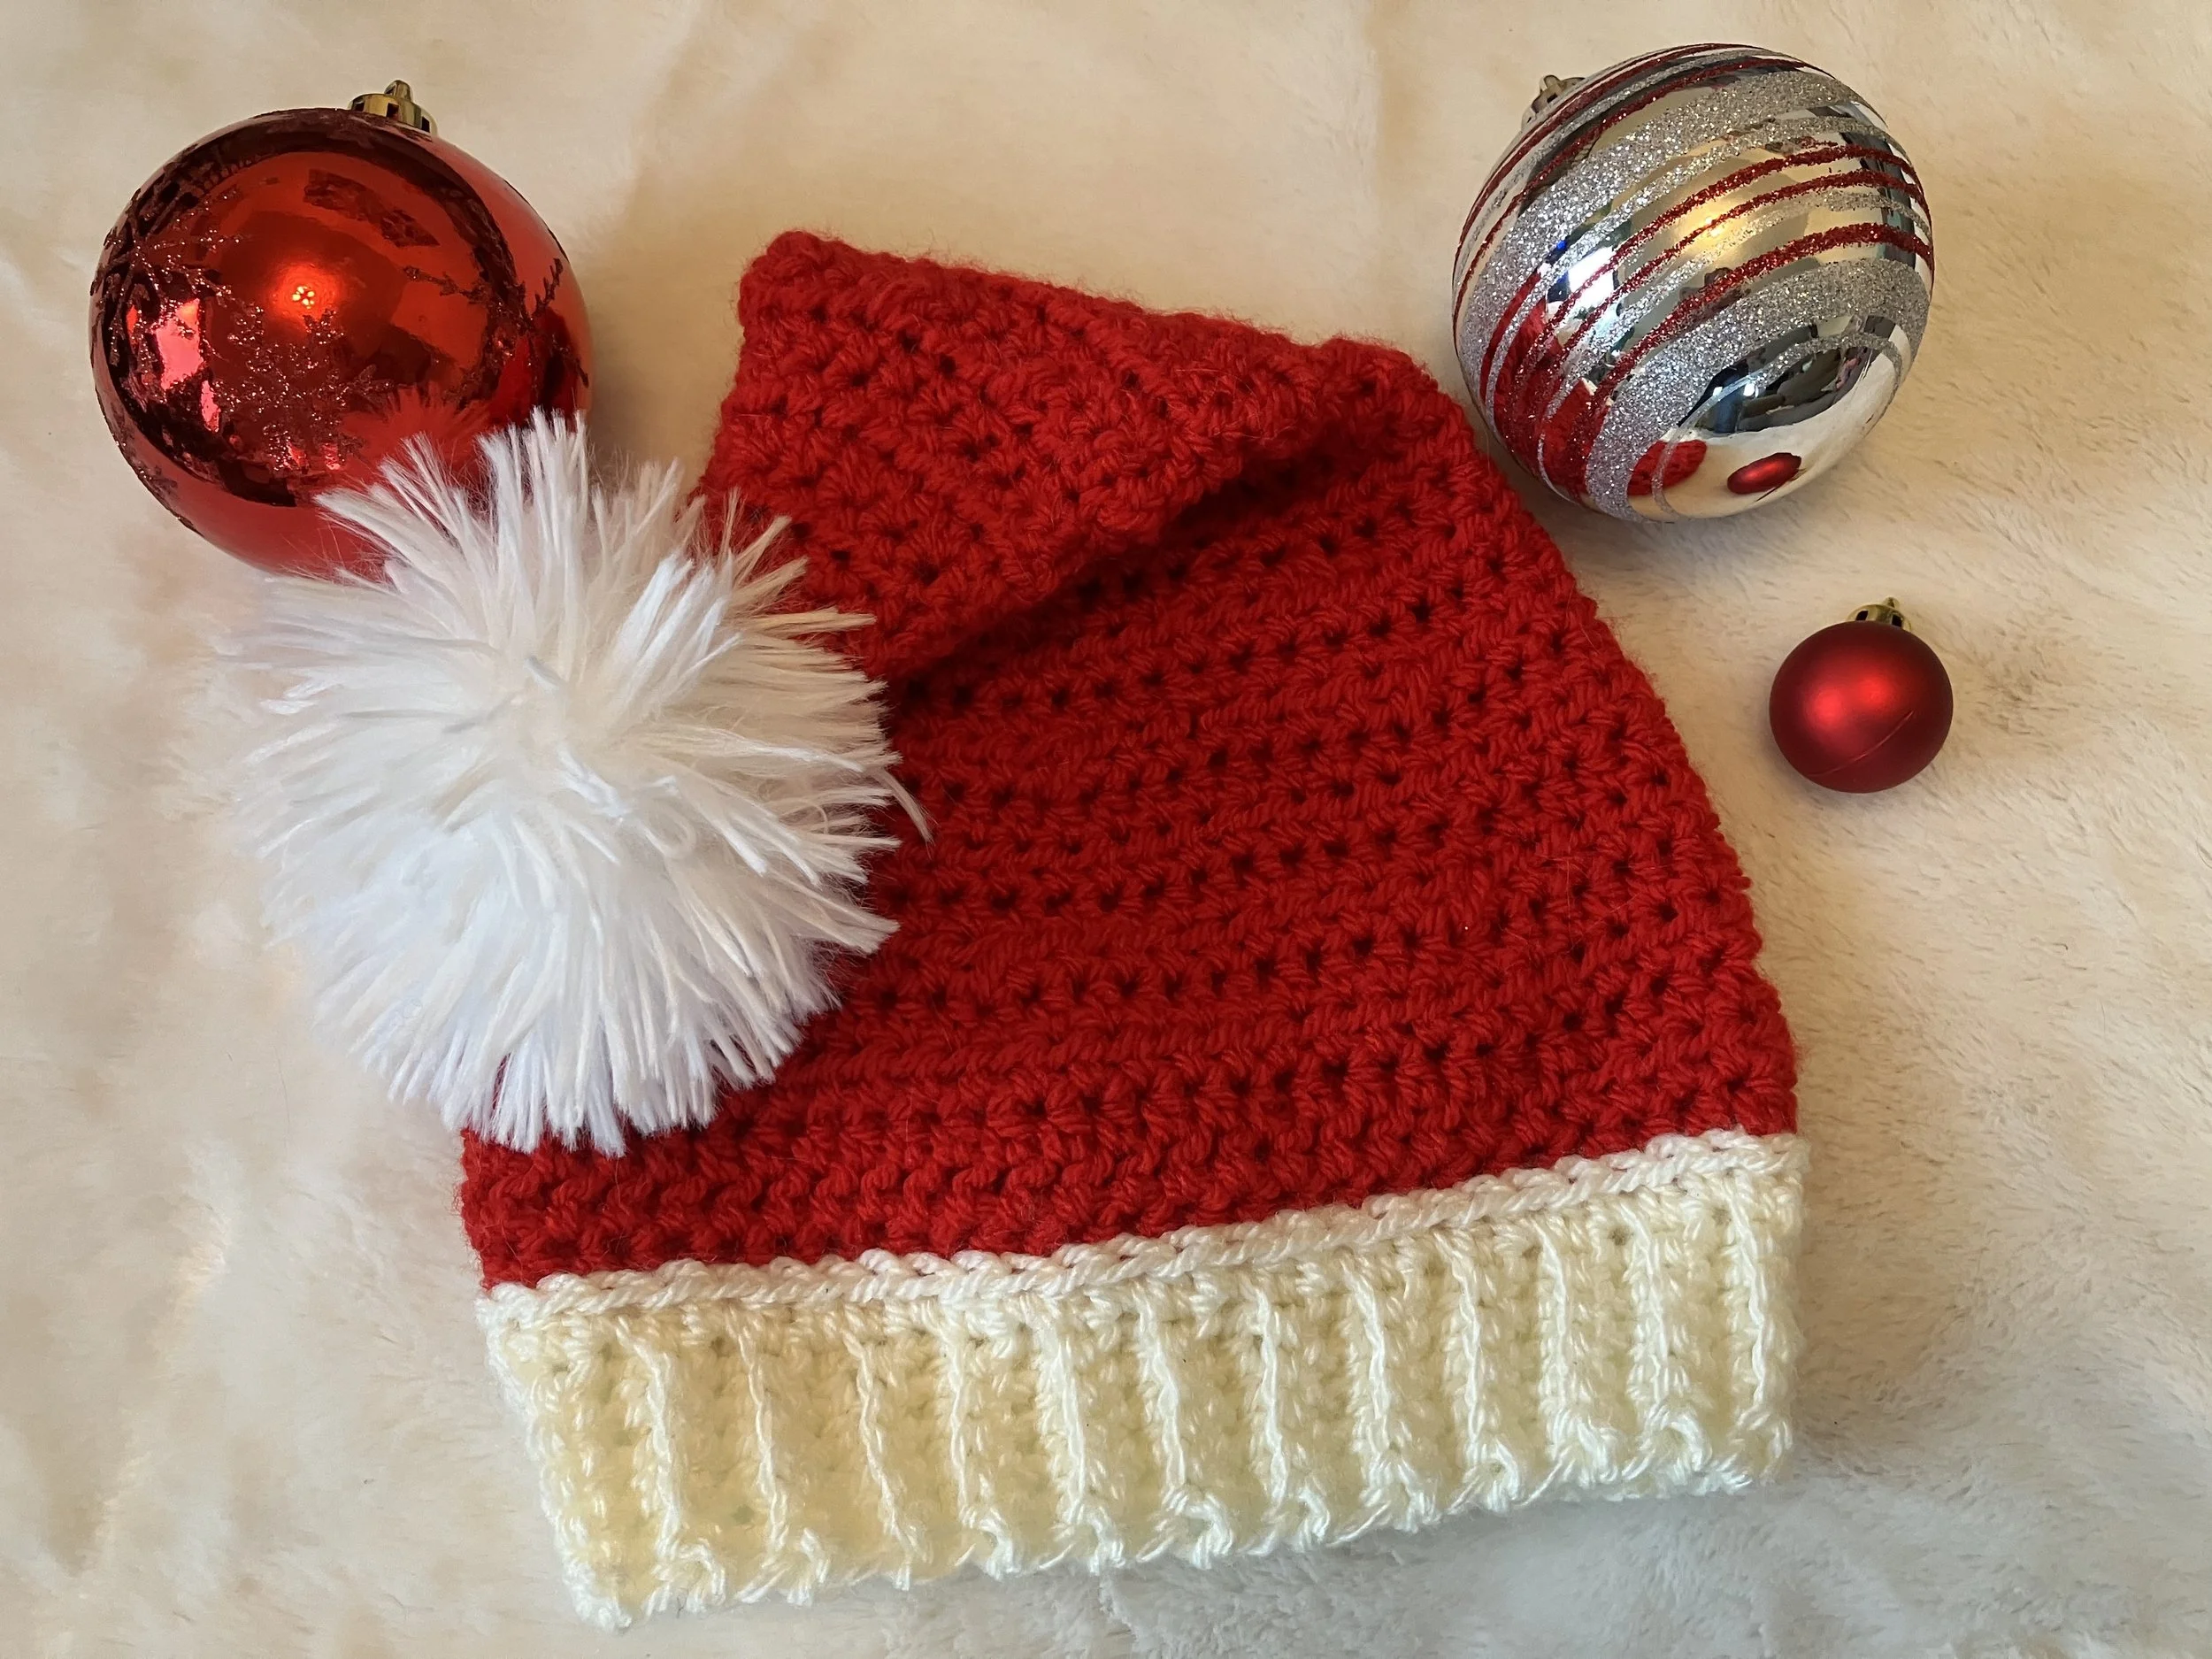
Super Simple Santa Hat - Free Crochet Pattern
The Super Simple Santa Hat is an easy crochet hat that is sure to bring that festive pop to your holiday parties and photos! Four sizes are written for this classic, two-toned look…
In December 2021, I freehanded some cute little Santa hats for my boys - then aged 3 and 8 months - for the holidays. Pretty soon after he saw the undeniable cuteness, my husband put in his order: “Can you make one of those for me next year?” A couple days later, we agreed that we ALL needed a Santa hat next year! My only issue as a completely inexperienced designer was that I hadn’t written down a pattern.
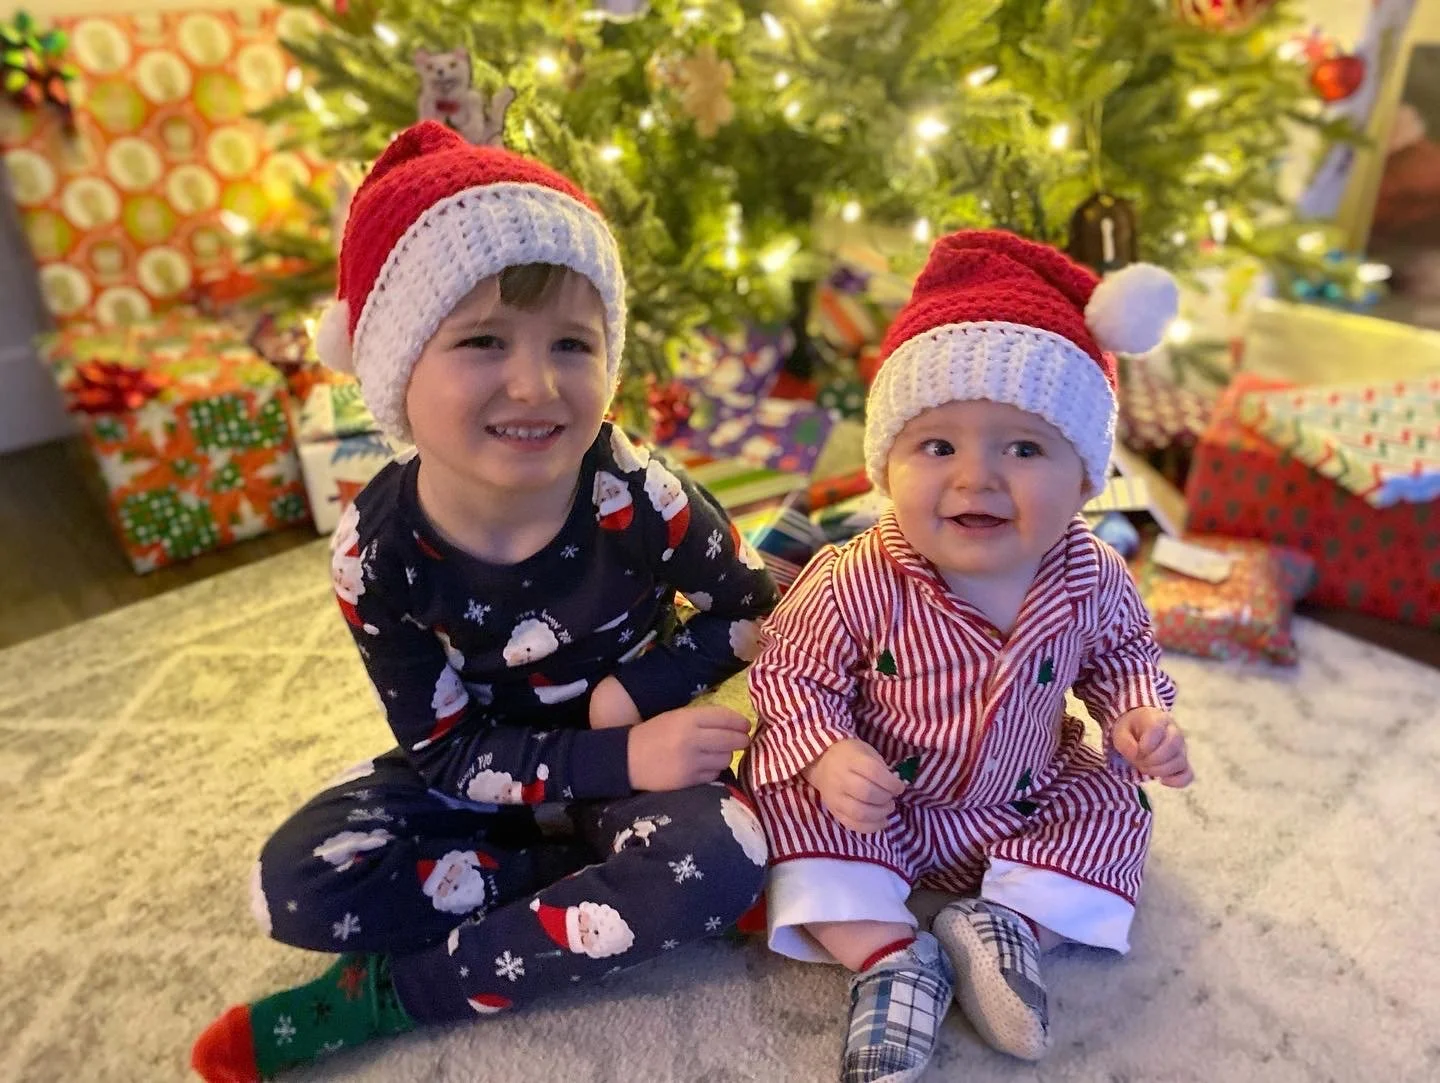
My boys, Christmas 2021
Well, December 2022 quickly arrived and I started trying to remake the tiny hat in a grown man size. After I started the first couple of rows, I started thinking, hmmmm - should I be writing this down? It was December 10th so it was pretty much certified insanity to try to release this pattern before Christmas even if I did write it down.
I started to jot down my steps anyways and reached out to my followers on Instagram asking if I should try to run a sprint-level pattern test to get this out on December 18th. There was a resounding “yes” and off we went - I ran a week-long test to get each size tested for this quick make so that I could get it released the week before Christmas.
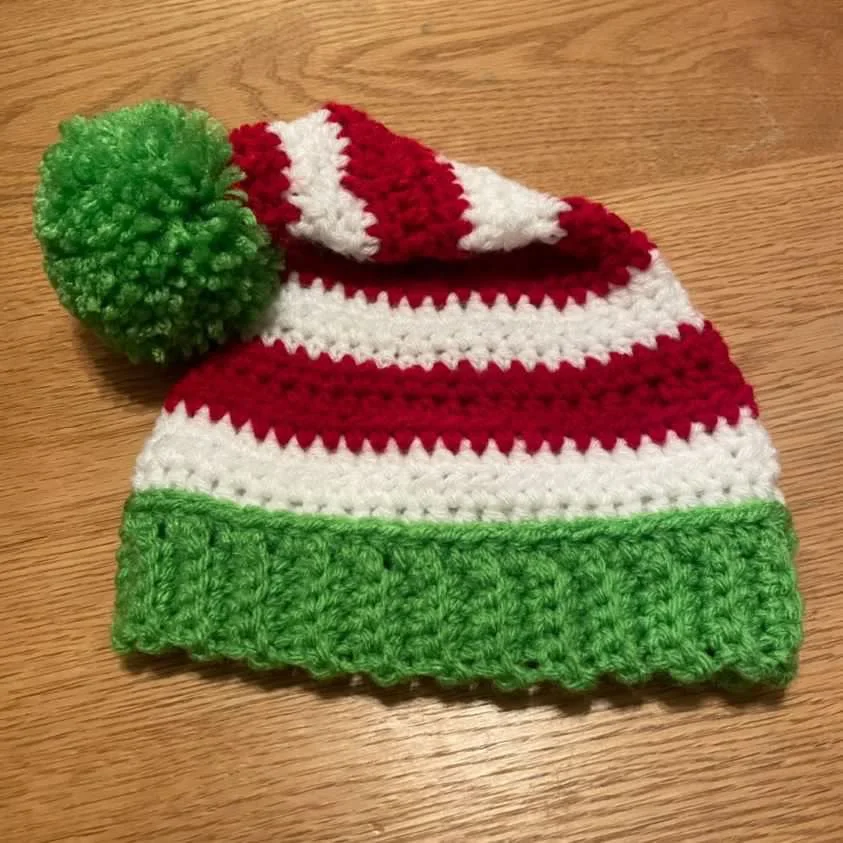
My amazing testers created the gorgeous creations below - in warp speed! The makers are listed here, in order, showing the incredible versatility when playing with colour and pom pom style: Holly, Tara, Katie, Nicole, Daisy, and Alice. Click on their names to see and follow their Instagram accounts!


To celebrate the holidays, I am offering the free crochet pattern in the child size below for my blog readers! I have also written the pattern in 3 other sizes (Baby, Child, Adult S, and Adult L) that fit head circumferences 16-24” in an ad-free PDF, which you can grab here on the site, or on Ravelry if that’s more your thing.
Scroll on to see the child-size pattern!
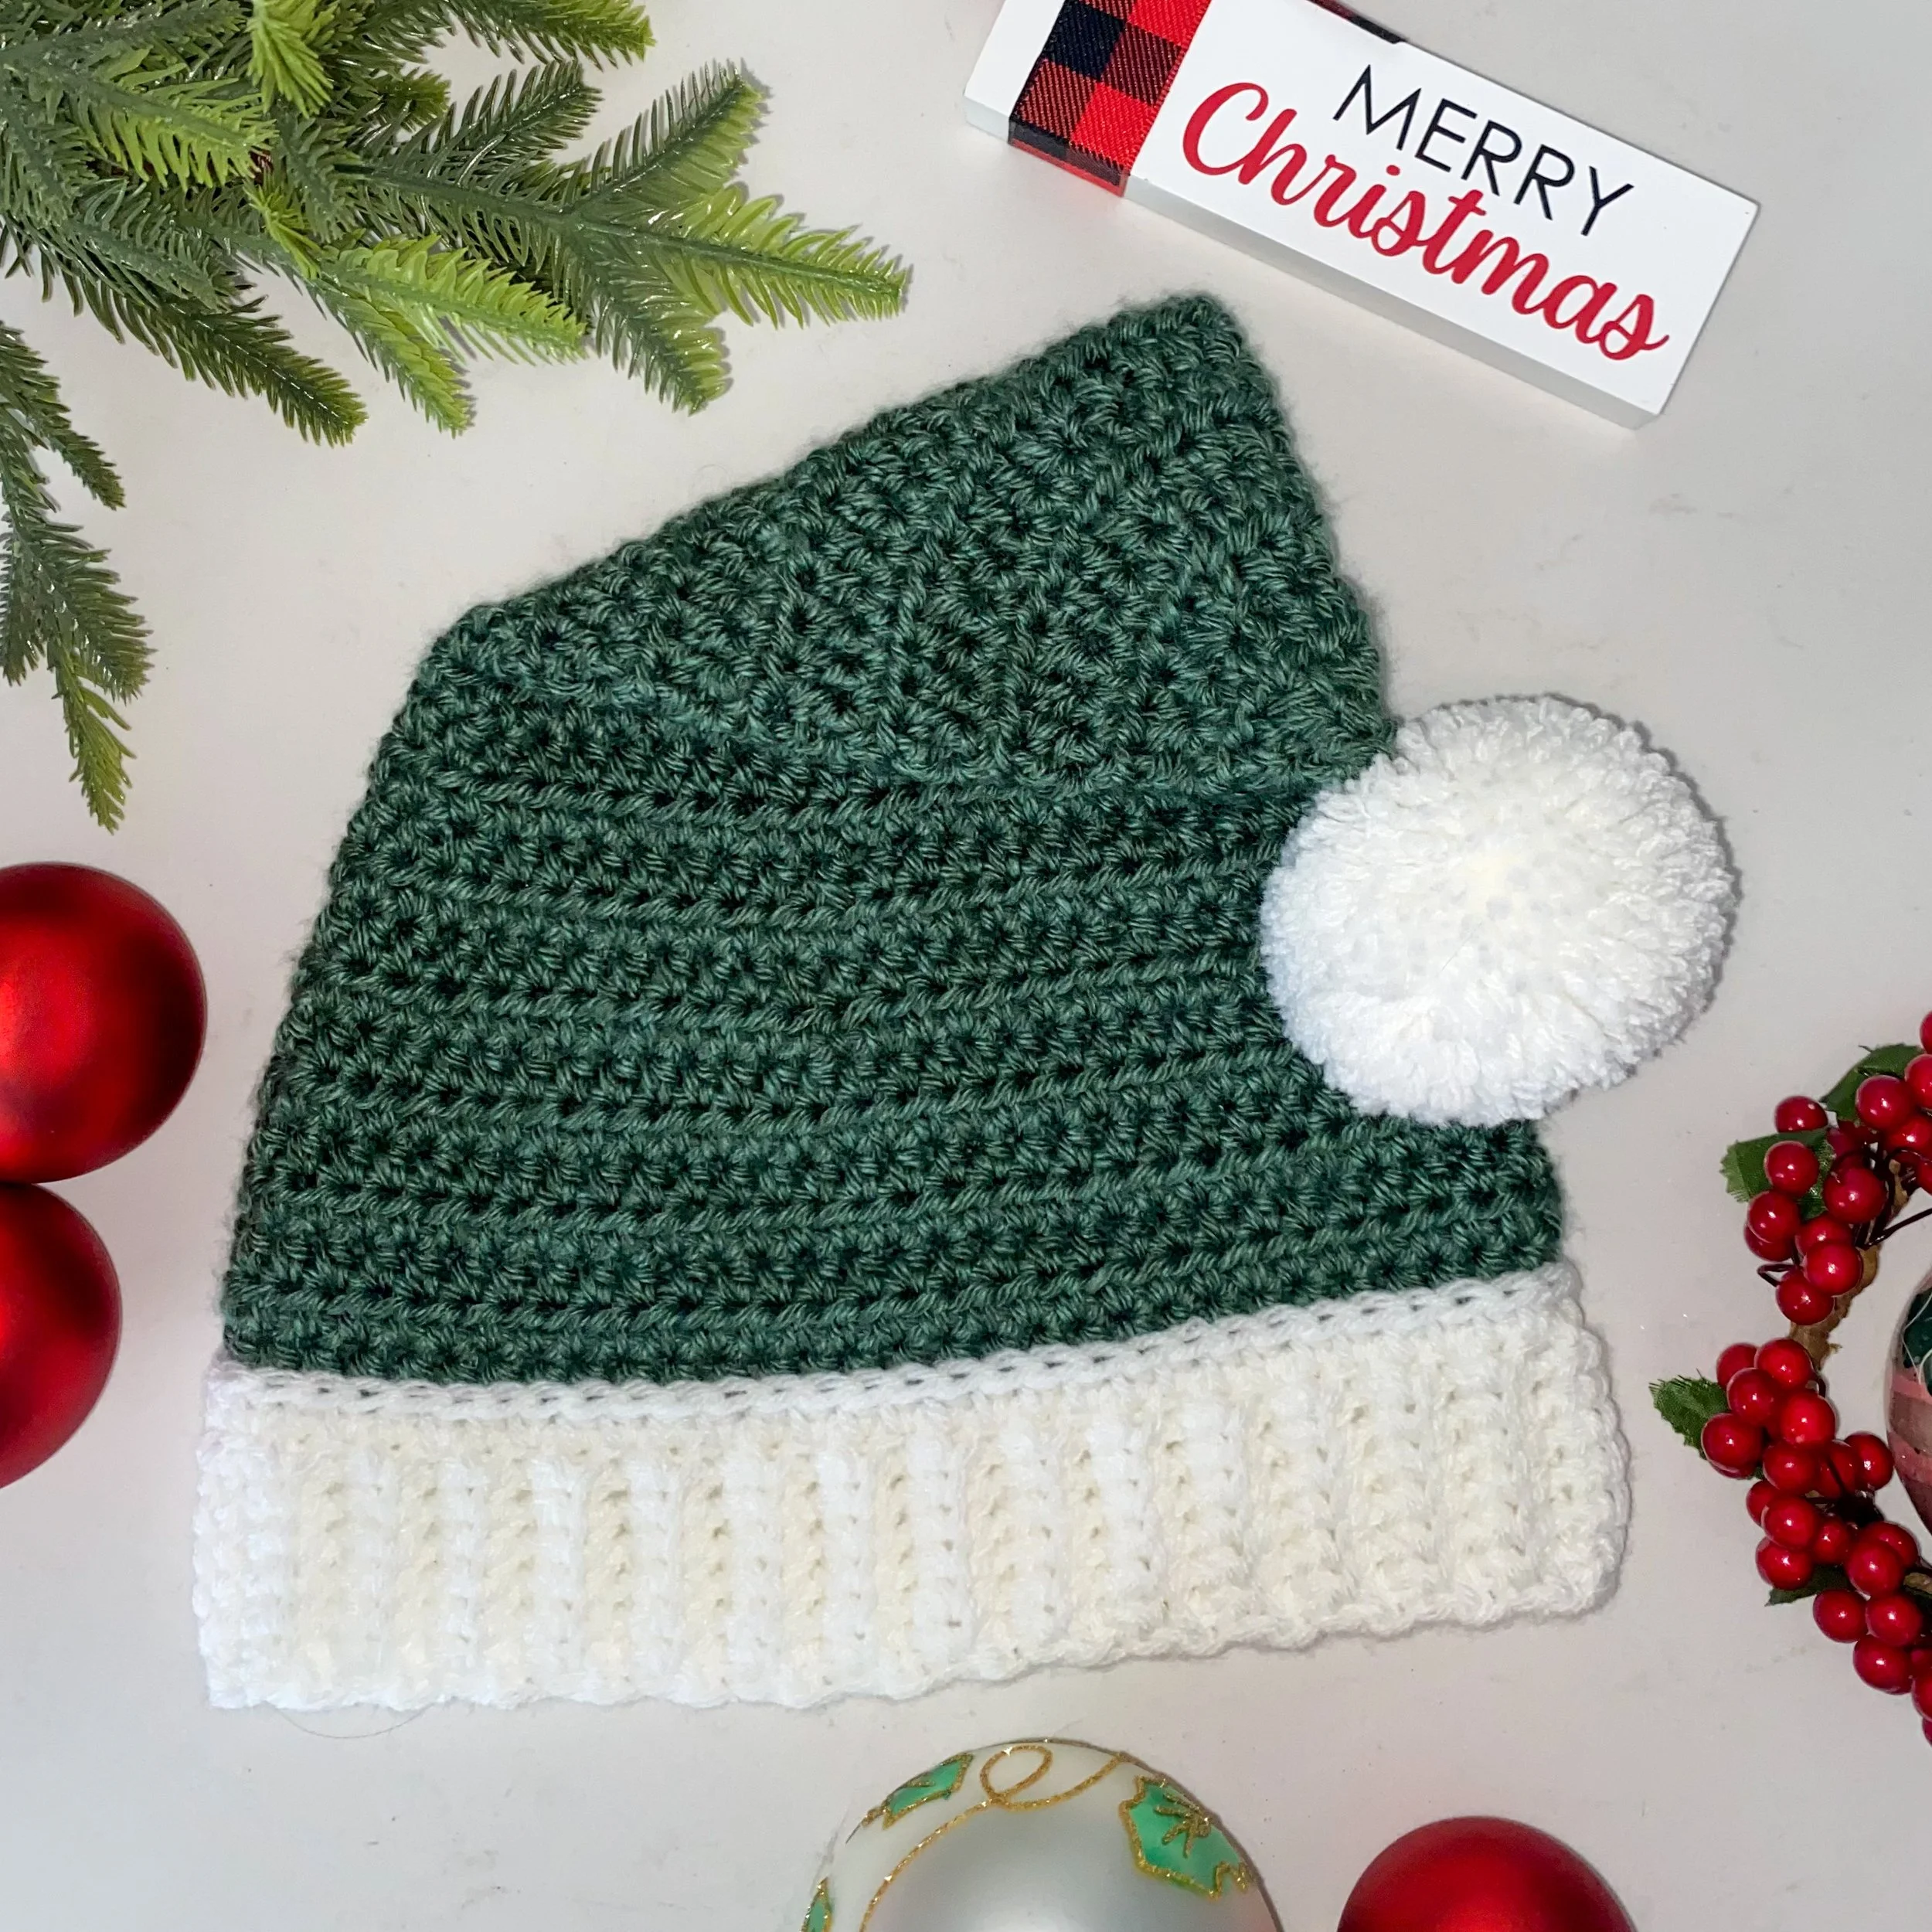
A green Super Simple Santa Hat in the Lion Brand Heartland Rocky Mountains colourway
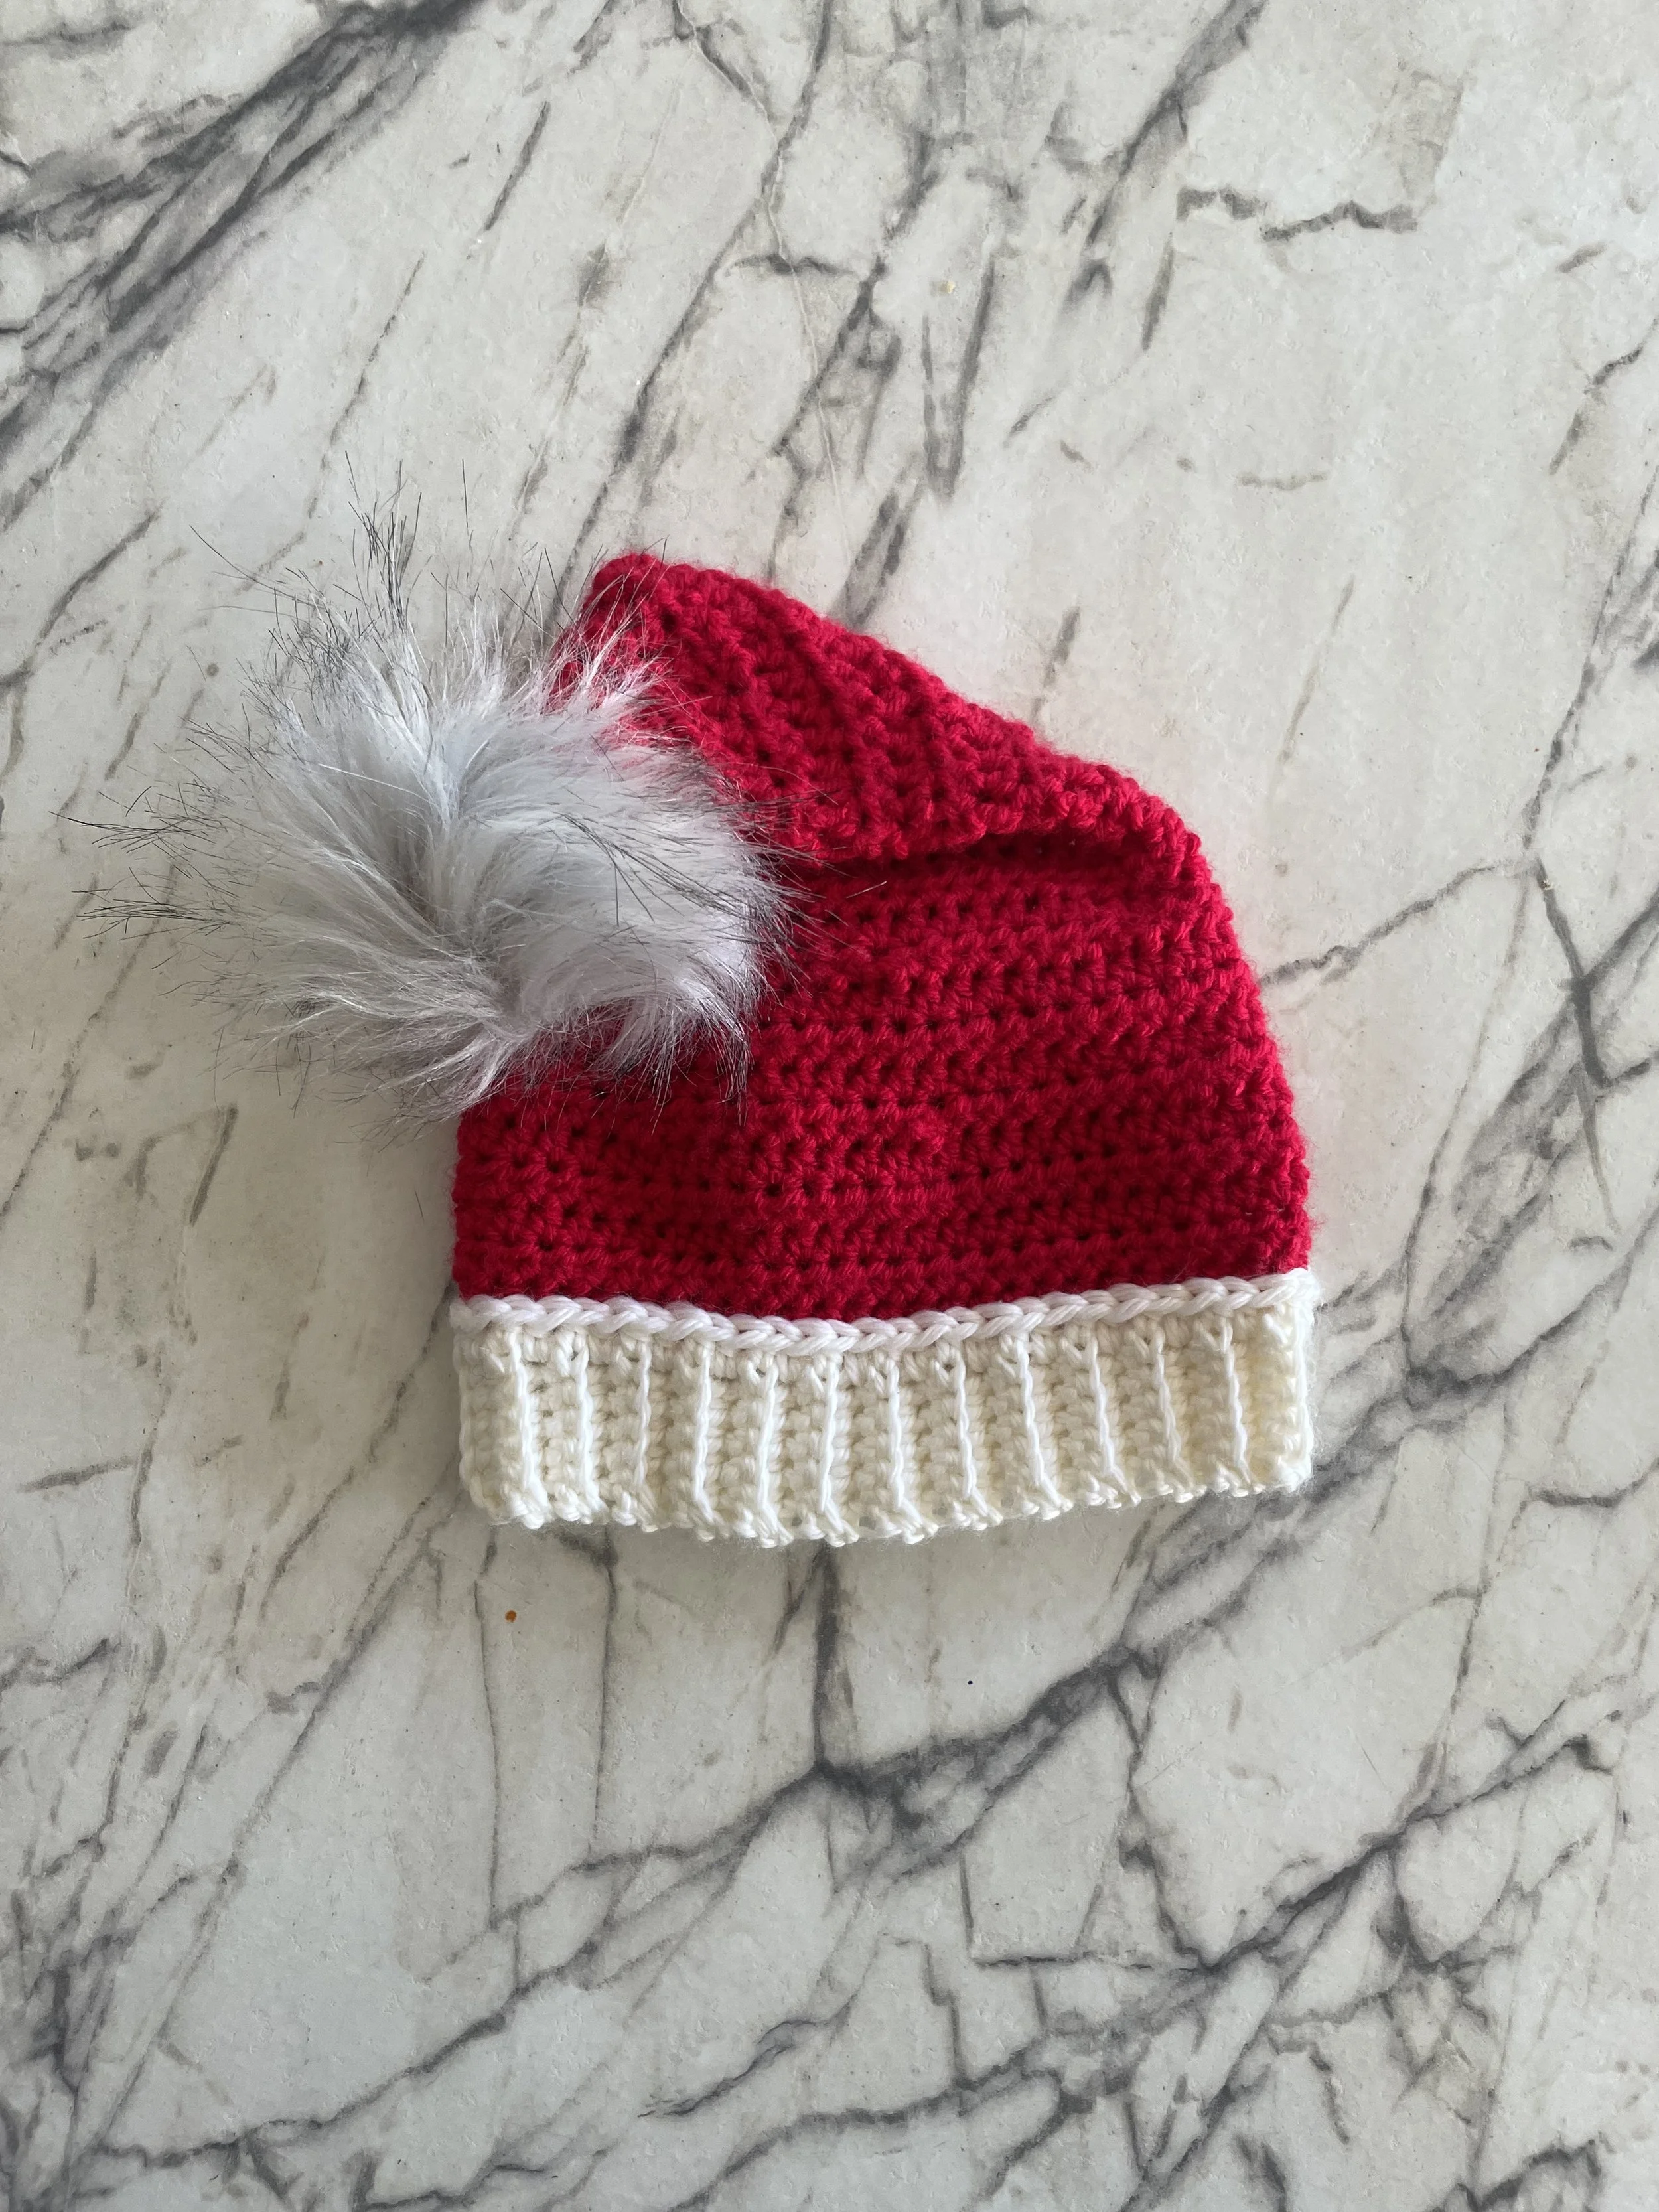
Super Simple Santa Hat - Child Size
Sizing
The child-sized beanie is intended to fit a head circumference of 18-20”.
Materials Needed
Weight 4 yarn (Aran), in yards:
90 yards main colour
30 yards trim colour
Yardage listed above does not include yarn to make a pom pom. If making a yarn pom pom, you will need an additional 25-40 yards of your trim colour, depending on pom pom size
Designer samples pictured in this pattern are made in Red Heart Supersaver in White, Lionbrand Heartland in Rocky Mountains, and Bernat Premium in Red
5.5 mm + 6mm crochet hooks (or hooks to meet gauge)
Scissors
Darning needle
Pom pom maker (optional) or faux fur pom pom
Difficulty Level
Beginner
Abbreviations
3rd loop // stitching into 3rd loop of previous round
BLO // back loop only
ch // chain
hdc // half double crochet
hdc2tog // half double crochet two together
MC // main colour
R# // round #
RS or WS // right side or wrong side
sc // single crochet
sl st // slip stitch
st or sts // stitch or stitches
TC // trim colour
Gauge
4 x 4” square. = 12.5 sts x 11 rows hdc with 5.5mm hook
Pattern Notes
This pattern is written in US terminology.
Ch 1 does not count as a stitch.
You will use the 6mm hook for the brim and the 5.5mm hook for the hat body (or two hook sizes to meet gauge).
You only need to know basic stitches for this pattern, including how to hdc2tog (decrease) and how to stitch into the 3rd loop.
The brim is worked flat in rows and then joined together.
The body of the hat is worked into the side of the brim rows, and then worked in joined rounds.
You will need to turn your work after every round.
The pom pom is created separately and then attached at point of the hat body. You can also use a faux fur pom pom if you prefer.
The Pattern: Brim
In TC with your larger hook, leave a long tail when creating your slip knot. This will be used for seaming later. Ch 6 (7, 8, 9).
R1: Working into the back bumps, sc into the second ch from the hook, and across. Ch 1 and turn. (5, 6, 7, 8)
R2 - R54: Sc BLO across until 1 st remains. Sc in last st. Ch 1 and turn.
After row 54, sl st to join to the first row at the top. Flip your work inside out so the sl st sits on the inside of the work, then ch 1. Now you will be working into the sides of the brim rows.
If you wish, you may now seam together the gap on the brim with the long tail you left when creating your slip knot. You can also leave this step until the end.
Hat Body
R1: Continuing with TC, switch to your smaller hook and hdc into the side of each brim around. Sl st to first hdc and fasten off. (54)
Join MC to the first st in the round. Ch 1 with MC, do not turn.
R2 (MC): Keep the RS facing you, and hdc in the 3rd loop around (which is located on the WS). This will create a braided ribbing effect to separate your colour change smoothly. Sl st to first hdc to join. Ch 1 and turn.
R3: Hdc around. Sl st to first hdc to join. Ch 1 and turn.
R4-6: Repeat R3.
R7: *Hdc2tog, then hdc 7.* Repeat * * around. Sl st to first st to join. Ch 1 and turn. (48)
R8-10: Repeat R3.
R11: *Hdc 6, then hdc2tog.* Repeat * * around. Sl st to first st to join. Ch 1 and turn. (42)
R12-13: Repeat R3.
R14: *Hdc2tog, then hdc 5.* Repeat * * around. Sl st to first st to join. Ch 1 and turn. (36)
R15-16: Repeat R3.
R17: *Hdc 4, then hdc2tog.* Repeat * * around. Sl st to first st to join. Ch 1 and turn. (30)
R18-19: Repeat R3.
R20: *Hdc2tog, then hdc 3.* Repeat * * around. Sl st to first st to join. Ch 1 and turn. (24)
R21-22: Repeat R3.
R23: *Hdc 2, then hdc2tog.* Repeat * * around. Sl st to first st to join. Ch 1 and turn. (18)
R24-25: Repeat R3.
R26: *Hdc2tog, then hdc.* Repeat * * around. Sl st to first st to join. Ch 1 and turn. (12)
R27-28: Repeat R3.
R29: Hdc2tog around. Sl st to first st to join. Ch 1 and turn. (6)
R30 (hat point): Repeat R29 and fasten off. (3)
Pom Pom Instructions
Make a yarn pom pom in your desired size using the TC. You can make it with a pom pom maker accessory or by following the finger wrap method. There are many video tutorials online on how to use each of these tools/methods. Whichever you choose, be sure to leave a long tail for sewing the pom pom onto the hat body.
You may also use a faux fur pom pom if that is preferred.

After creating or choosing a pom pom, sew your it onto the pointed end of the hat body. If using a yarn pom pom, I recommend passing your first couple of stitches through the entire pom pom (from bottom to top, then back through), followed by taking time to secure the bottom edge of the pom pom to the tip of the hat.
Sew in all remaining ends and sew together your brim seam if you didn’t already complete that step.
Enjoy your Super Simple Santa Hat!
Need the other sizes for the Super Simple Santa Hat? The ad-free PDF with sizes Baby, Child, Adult S, and Adult L is available on AllTradesV.com and Ravelry.
Happy holidays to all who celebrate! Thank you for your support this year!
-Victoria

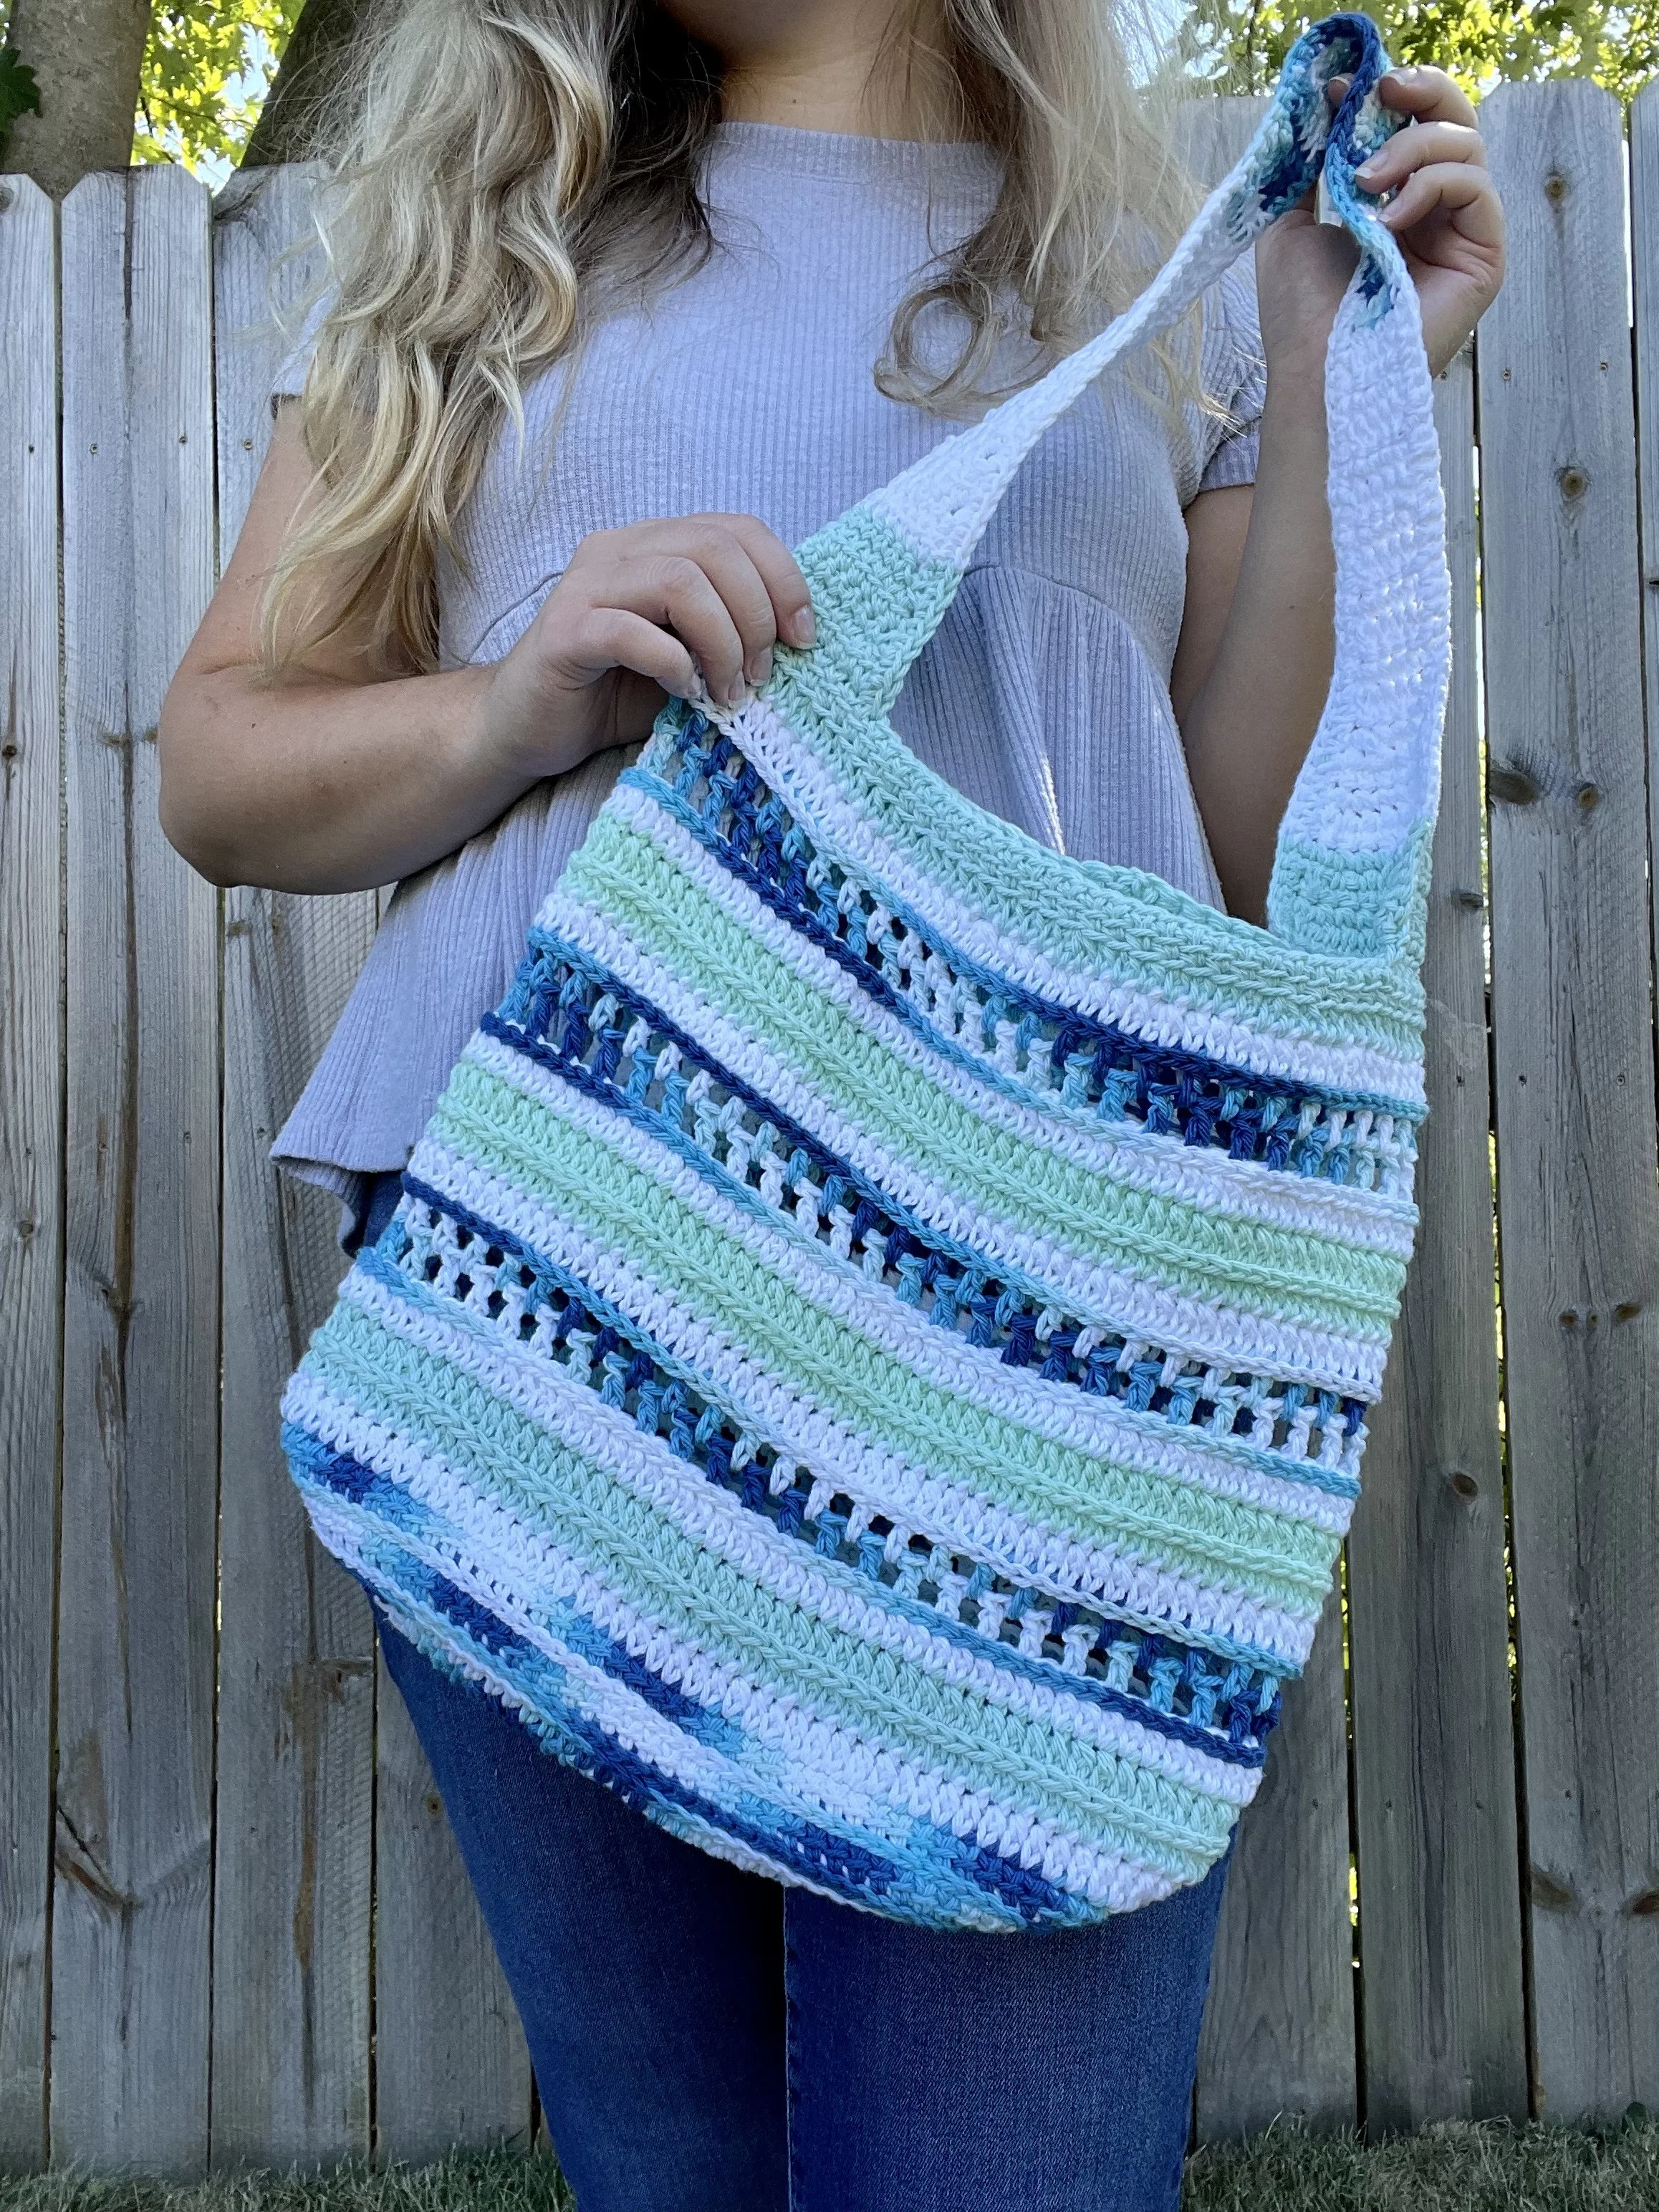
The Looking Glass Tote
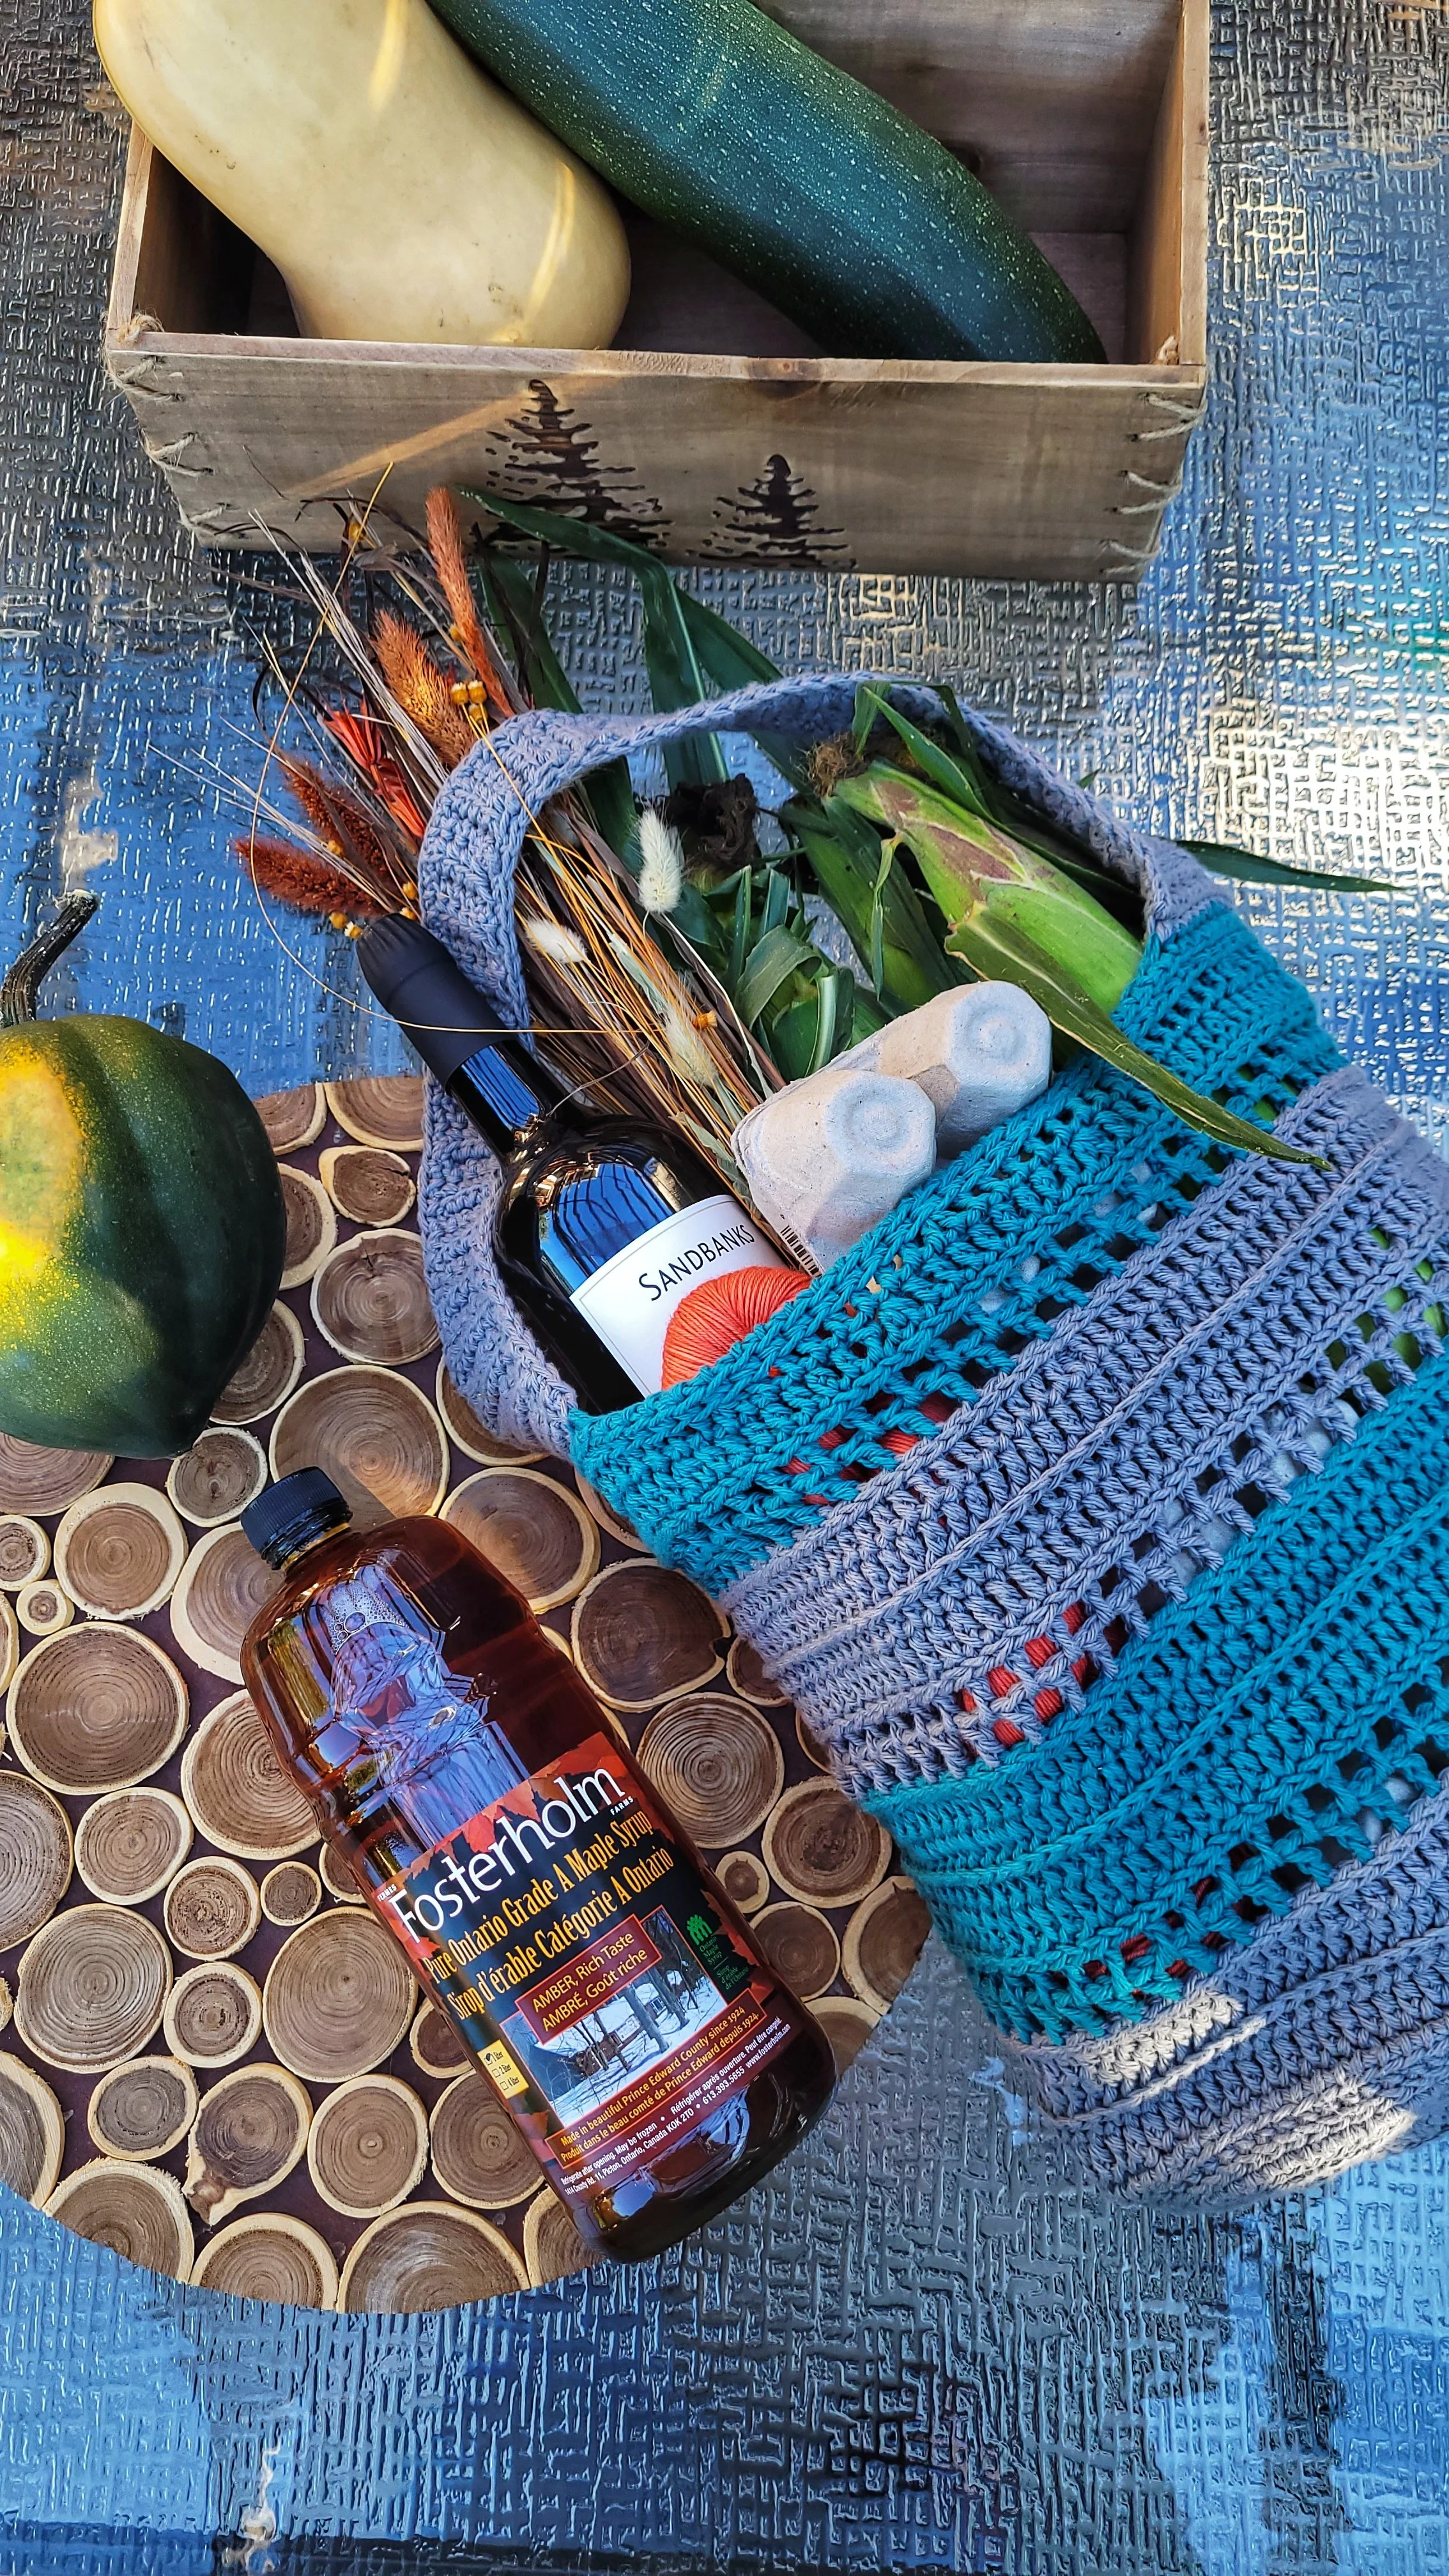
Fresh out of testing, the Looking Glass Tote is here. This bag boasts cute style and functionality all rolled into one! With a mesh window repeat similar to the Looking Glass Top, a wide tapered strap, and 4 sizes to choose from, what’s not to love?!
Fresh out of testing, the Looking Glass Tote is here. This bag boasts cute style and functionality all rolled into one! With a mesh window repeat similar to the Looking Glass Top, a wide tapered strap, and 4 sizes to choose from, what’s not to love?!

Looking Glass Tote - Size L in Bernat Handicrafter/Hot Green
So now, a little about the pattern:
intended for the adventurous advanced beginner to intermediate crocheter
written in US terms (and is a great stash or scrap buster! Check out the tester images below!)
uses Weight 4 cotton yarn
has a ton of photo, video, and diagram tutorial support sprinkled throughout
4 size options (S, M, L, XL - which act as wine tote, day bag, market bag, and beach tote, respectively)
You can pick up your digital download of the Looking Glass Tote pattern on my site or on my Ravelry page by clicking the buttons below!
Not sure the Looking Glass Tote sizing? Here are some tester images across the size range so you can get a flavour of how customizable this tote really is!
Testers, in order from L-R, top to bottom: @crochet.by.alau (Size S + Looking Glass Top!), @celticwintercomforts (Size S), @stephmadethat (Size M), @punkypeachcrochet (Size M), @ilexholly23 (Size M), @bididdlestitches (Size L), @kangasheep (Size L), @theskeiniac (Size XL), @handmade_by_hannahbeth (Size XL)


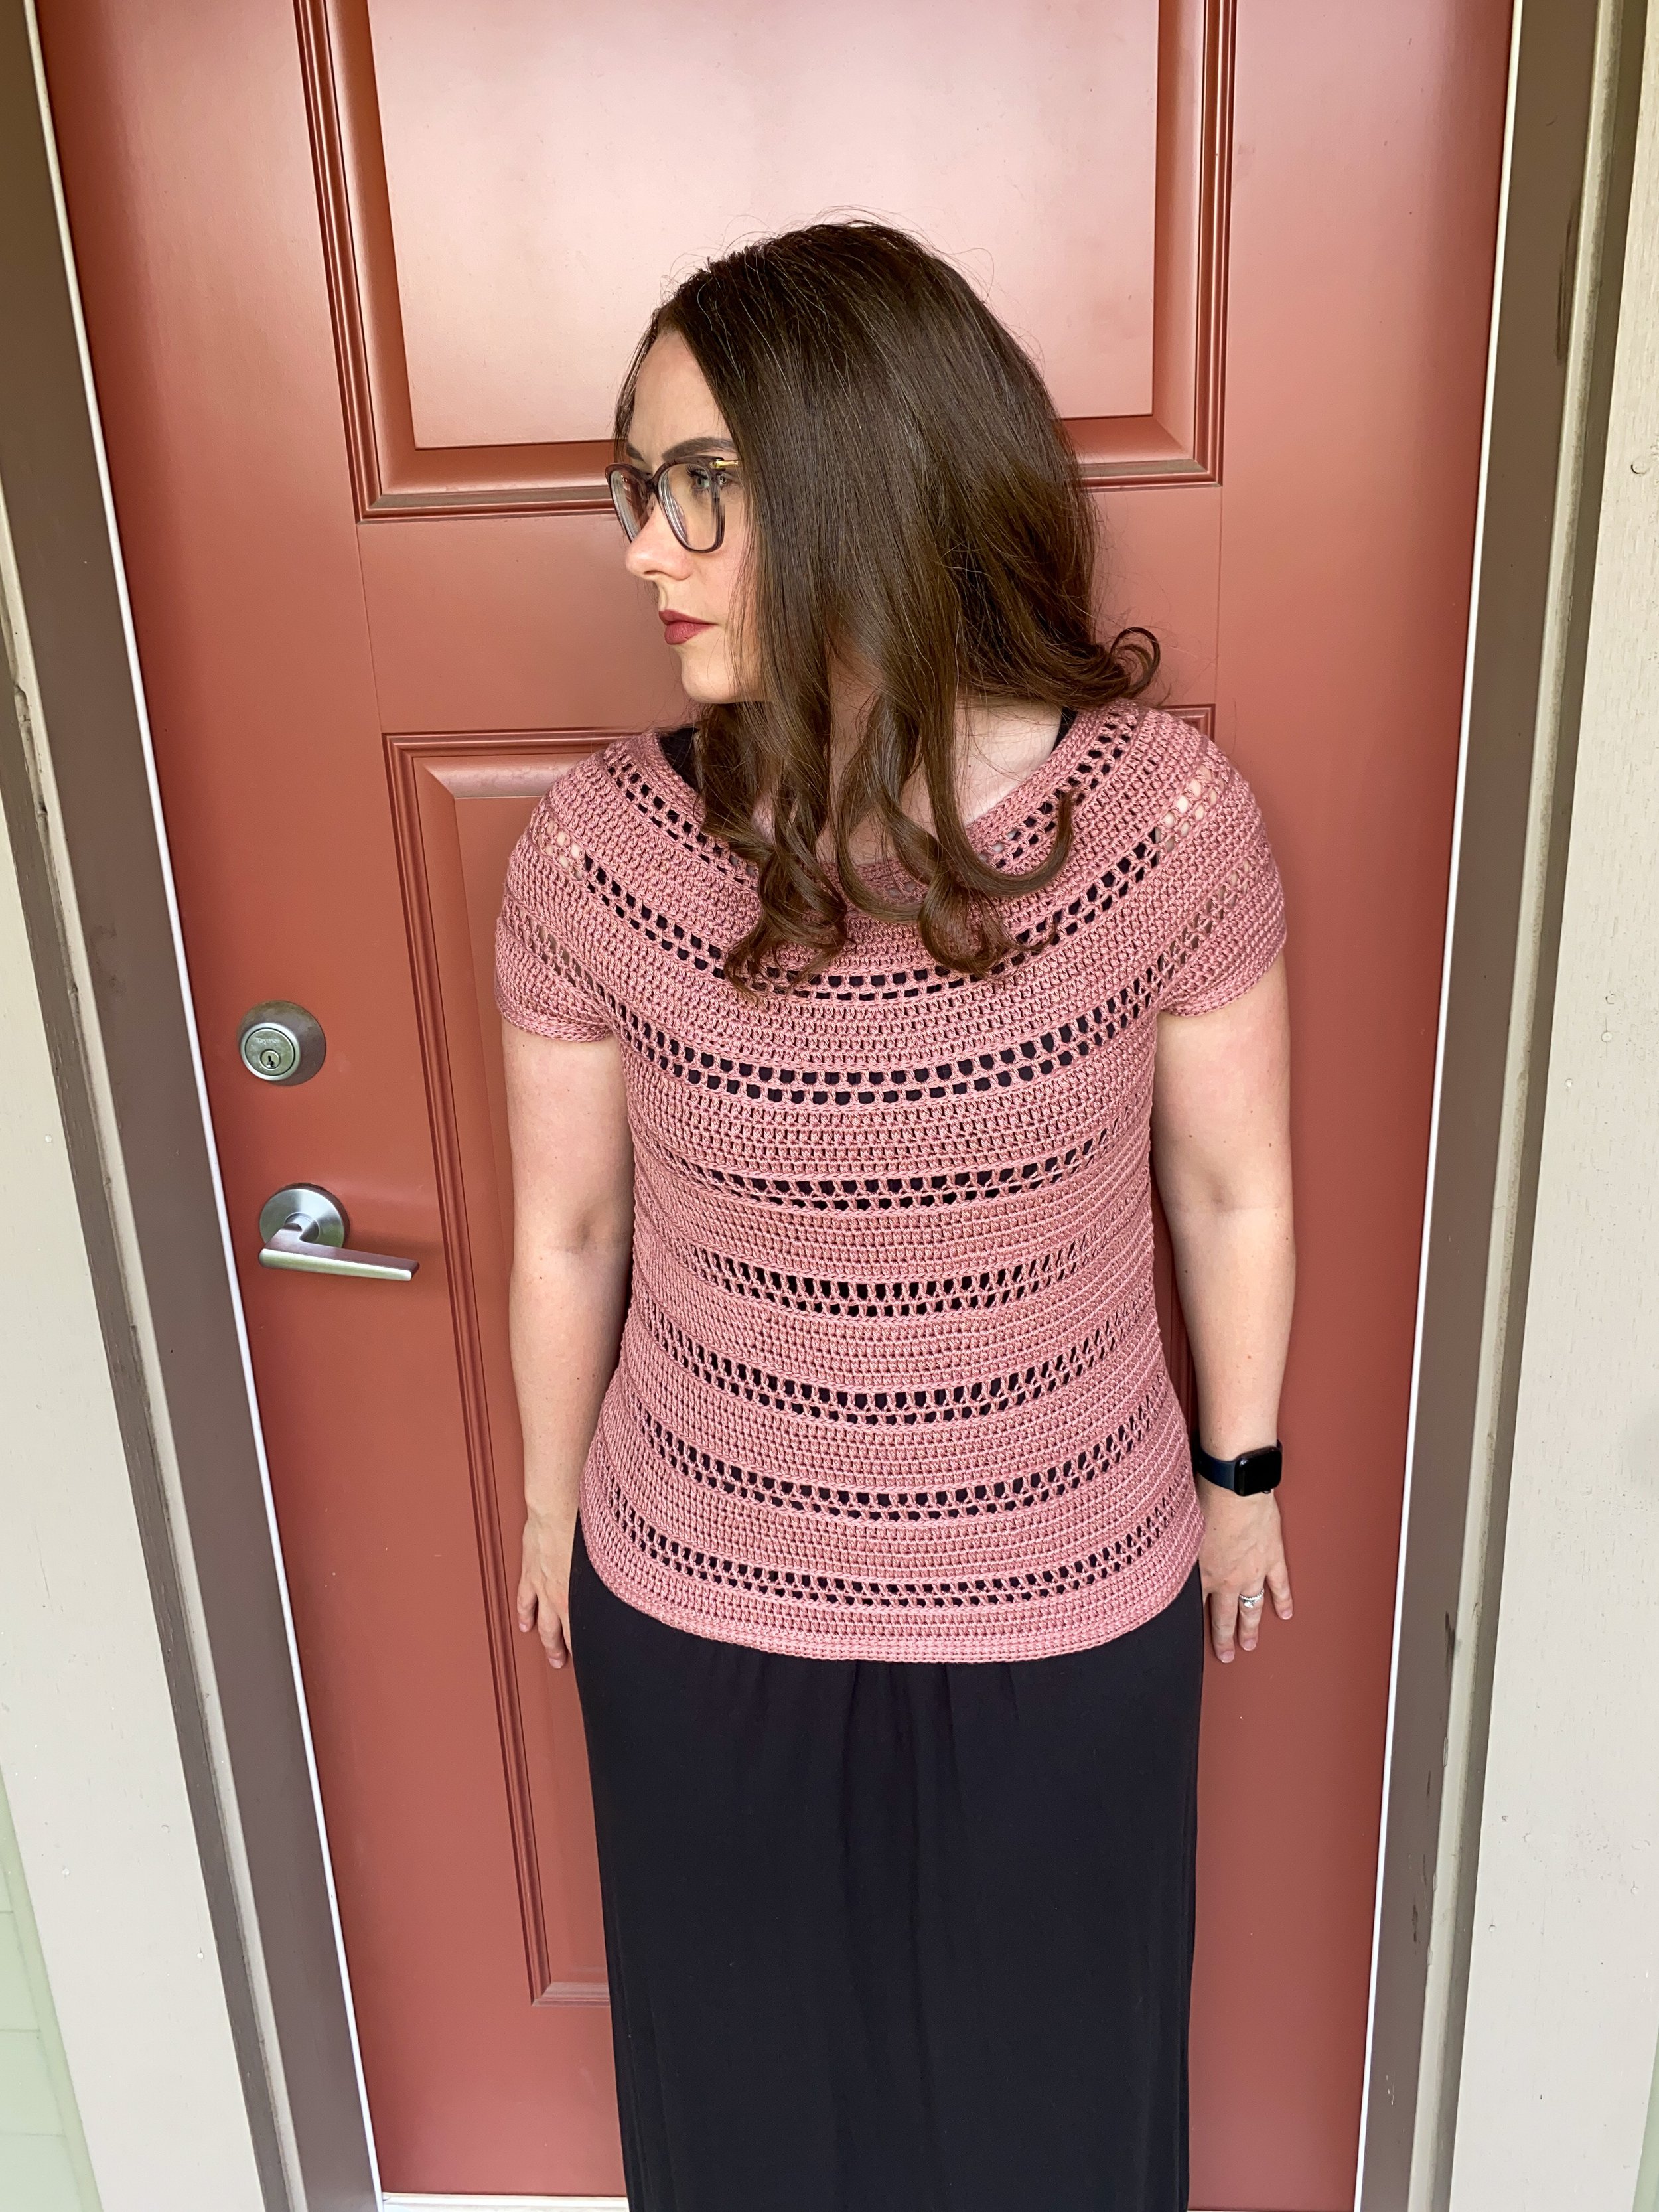
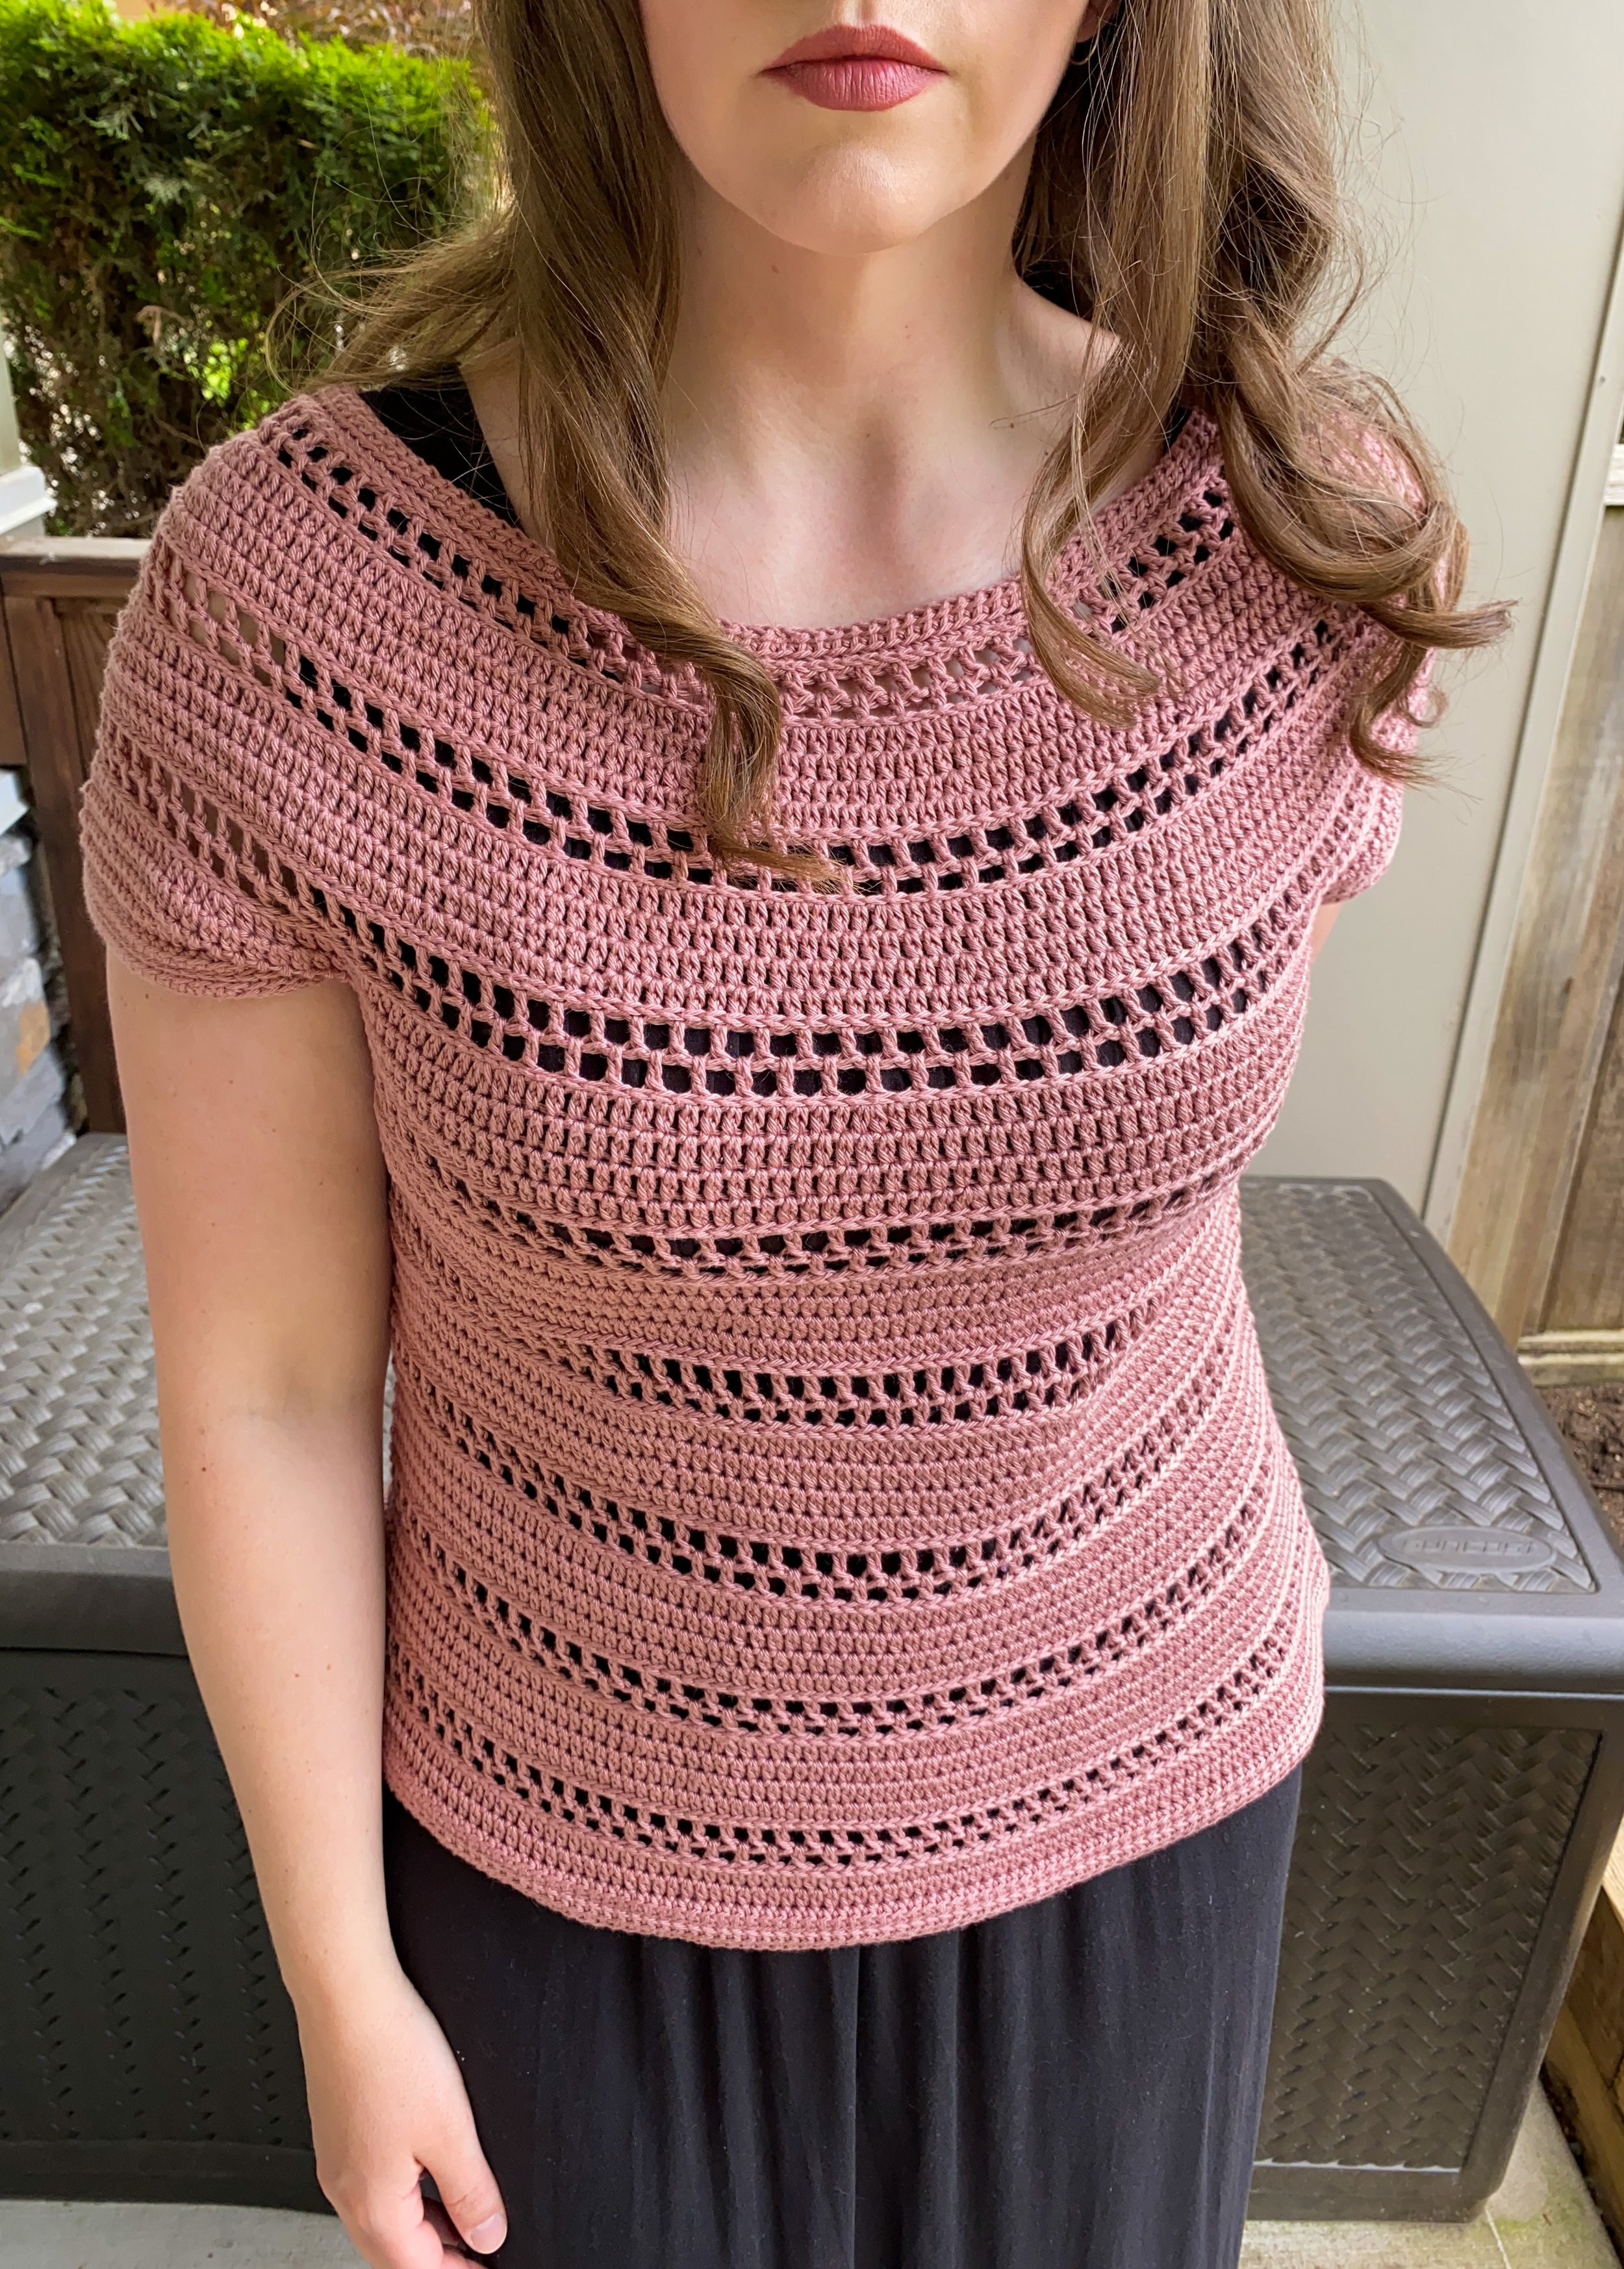
The Looking Glass Top
I absolutely cannot believe the day is finally here - it’s time to release the Looking Glass Top! This is my very first pattern release everrrrr, and I’m so excited to share it with you.
I absolutely cannot believe the day is finally here - it’s time to release the Looking Glass Top! This is my very first pattern release everrrrr, and I’m so excited to share it with you.


The inspiration for the Looking Glass Top stitch pattern came from mucking around with gauge swatches one day. I decided I wanted to design a fitted top with it, and that a top-down yoke design might be best so that I would be able to do fit tests and make adjustments as I went. Little did I know the massive learning curve that would come with this, as I had no experience with designing, let alone doing so with a top-down pattern. Or grading that pattern. Yikes.
But those who know me, know: if there is something to be conquered, I will study it and rework it until I reign supreme. This involves knowing when to get help when needed, too (thanks, Courtney! Check out her mentorship program if you’re an aspiring designer. Seriously).
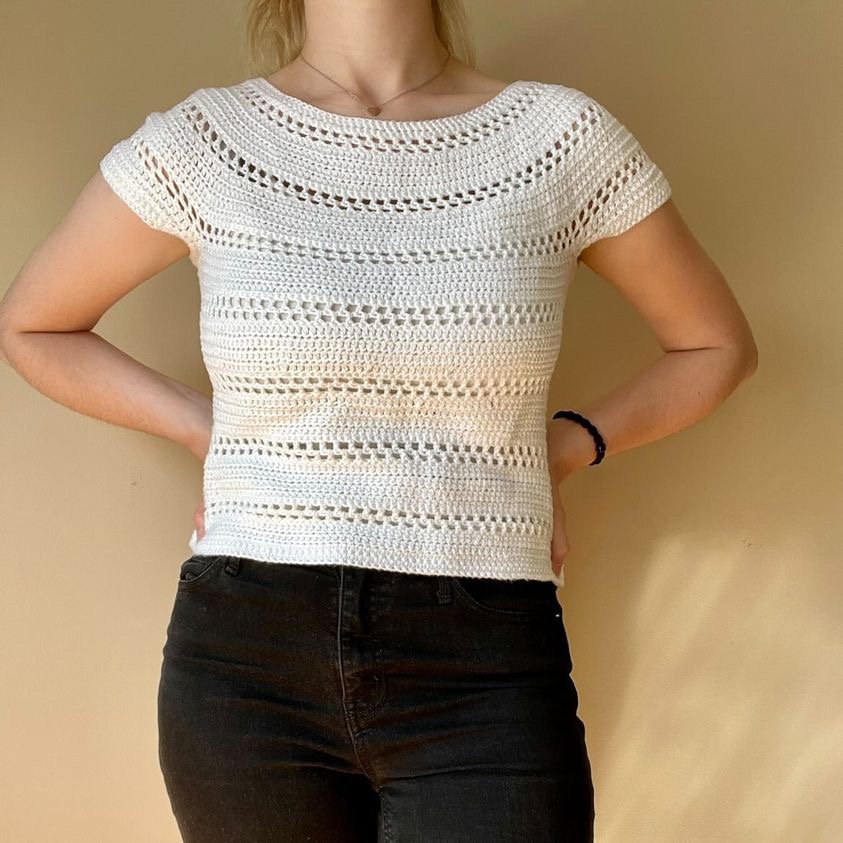
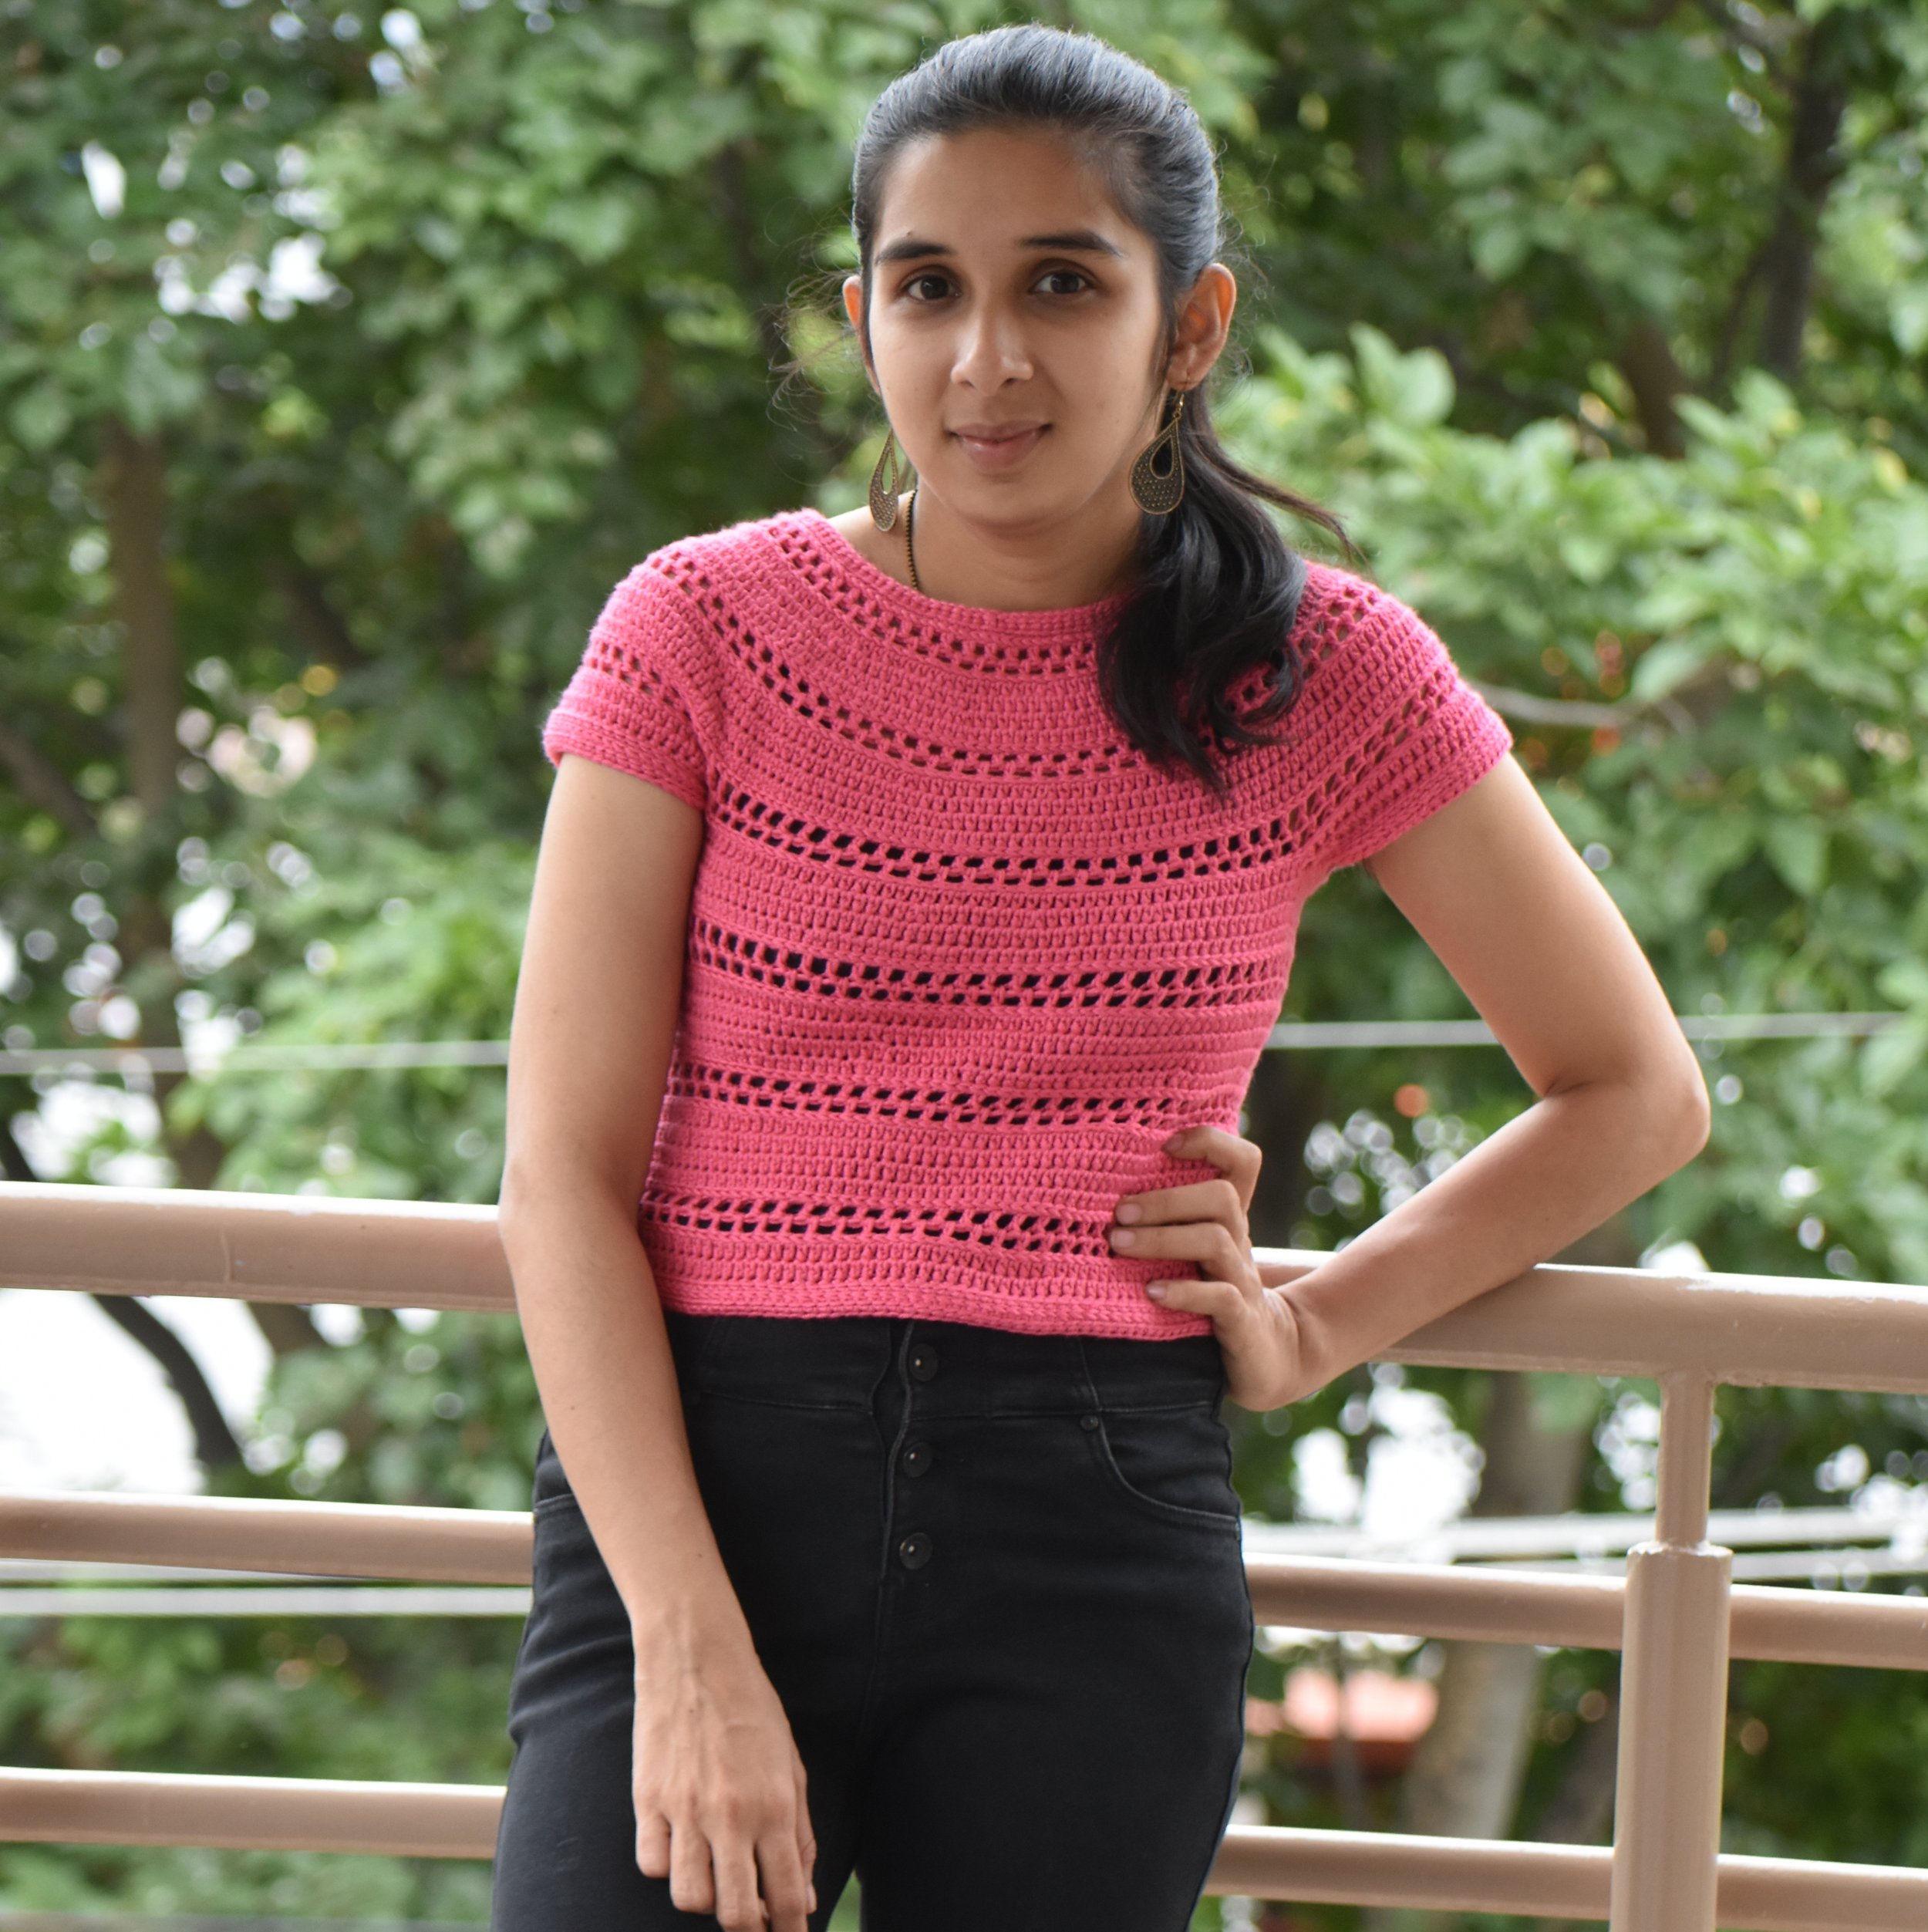
The Looking Glass Top turned out to be a classic fitted top with beautiful mesh and slip stitch detailing throughout the yoke and body. She is an intermediate level pattern, size inclusive (XS-5X), has tons of support embedded (like video and photo tutorials!), is written in US terms, and is extremely customizable to your fit preferences through the waist, hips, and sleeves.
You can pick up your digital download of the Looking Glass Top pattern on my site or on my Ravelry page by clicking the buttons below!
Not sure how the Looking Glass Top might fit? Considering some customizations? Here are some tester images across the size and colour range - some with length or body fit modifications - so you can get a flavour of how customizable this top really is!
Testers, in order from L-R, top to bottom: @punkypeachcrochet, @ilexholly23, @terrapinfiberworks, @fromnicolescreations, @crochet.by.alau, @flourish_and_yarns, @threadsoflife20, @halima_things, @hand_spun_bits, @shea_crochet, @its_annemade, @carla_crochetcrafts